Here’s a practical guide to removing bleach stains from fabrics—yes, there are ways to fix them or at least camouflage them!
How to Remove or Fix Bleach Stains from Fabrics
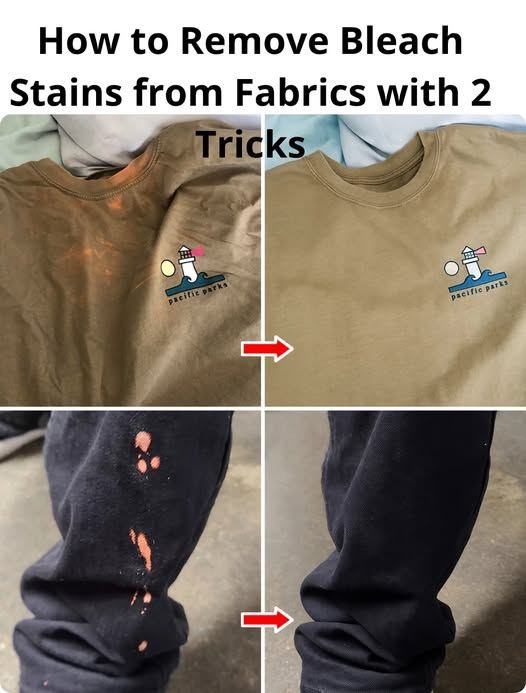
Bleach stains are tricky because bleach actually removes the color from the fabric, leaving a lighter spot. You can’t “un-bleach” it, but you can restore color or disguise the spot.
Trick 1: Use a Fabric Marker or Dye Pen
- Best for small stains (like a splash on a shirt).
- Steps:
- Find a fabric marker or dye pen that matches your garment.
- Carefully color over the bleach spot.
- Let it dry completely.
- Optionally, set the color with low heat from an iron (check marker instructions).
✅ Why it works: It reintroduces pigment where the bleach removed it.
Trick 2: Create a DIY “Tie-Dye” or Pattern
- Best for large or multiple bleach stains.
- Steps:
- Use fabric dye in a matching or contrasting color.
- Apply creatively—spray, sponge, or dip-dye around the bleach spot.
- Wash according to dye instructions.
✅ Why it works: It turns an accidental stain into a fashion statement.
Extra Tips
- Act quickly after a bleach accident—fresh stains are easier to disguise.
- Test markers or dyes on a hidden area first.
- For whites, sometimes bleach stains can’t be removed, but you can re-dye the entire fabric white using fabric bleach-safe dye or optical brighteners.
Bottom Line
Bleach removes color permanently, but you can:
- Touch up small stains with a fabric marker.
- Turn large stains into patterns with dye.
It’s less about undoing bleach and more about restoring or repurposing the color creatively.
I can also make a quick “Bleach Stain Rescue Kit” list—3 markers/dyes and step-by-step tips so any accidental splash is instantly fixable.
Do you want me to do that?
